Tables
Use the steps below when adding and editing Tables in your DejaPayPro POS.
These steps are done in the DeNovo Back office of your POS software. Login to DeNovo with the credentials
1. Within your DeNovo Back office, scroll down to the TABLES option under INVENTORY.
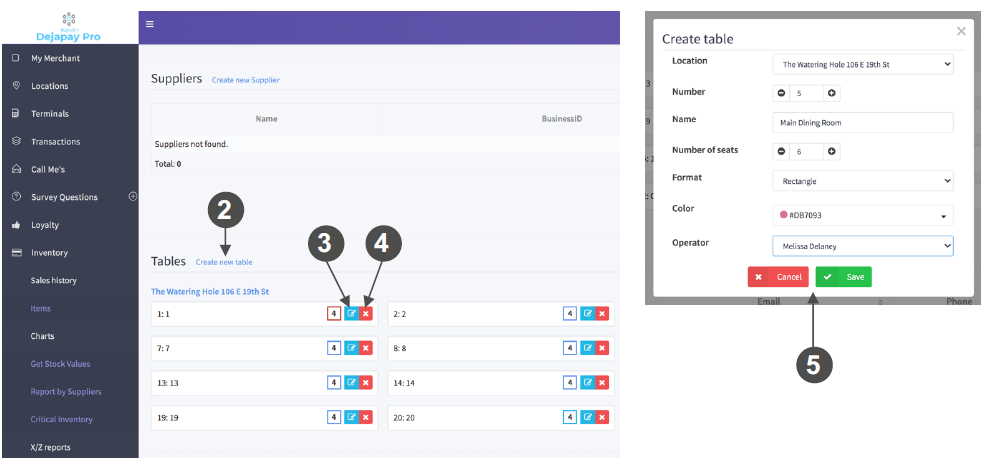
2. To create a new table, click on CREATE NEW TABLE.
3. To edit an existing table, click on the EDIT icon.
4. To delete an existing table, click on the DELETE icon.
5. To CREATE NEW TABLE enter the following information:
- Number – Input the desired number to assign this table.
- Name – Name the table (ie. main dining room).
- Number of seats – Input the number of seats available at the table.
- Format – Select the type of table from the drop down menu (ie. round, square).
- Color – Select a color for the table from the drop down menu, to assist with easy identification.
- Operator – Assign the table to a specific operator/server.
6. Repeat step 5 to add multiple tables.