Add/Edit a Category
In this section follow the steps to add or edit a category.
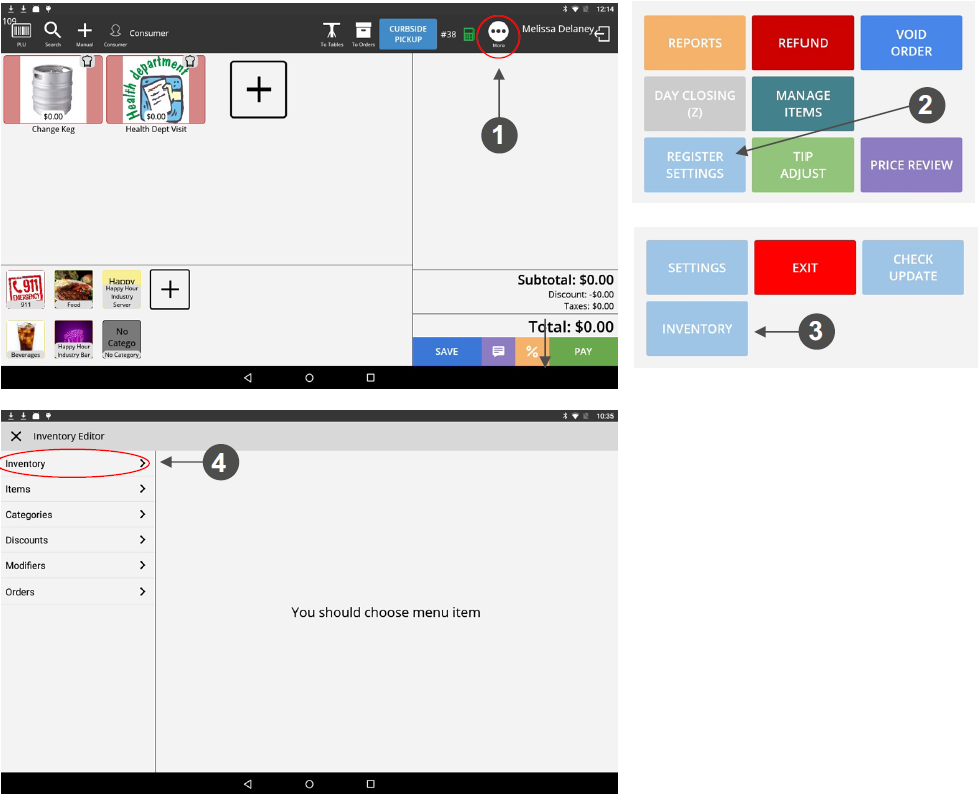
1. When you have your customer tab open, press the MORE… icon at the top right of the screen.
2. A new screen will appear with 6 buttons. Press REGISTER SETTINGS (Android devices) or EDIT INVENTORY (iOS devices).
3. When the next screen appears press the INVENTORY button (Android devices).
4. A new SETTINGS screen will appear. Tap on the word INVENTORY on the left hand side of the screen.
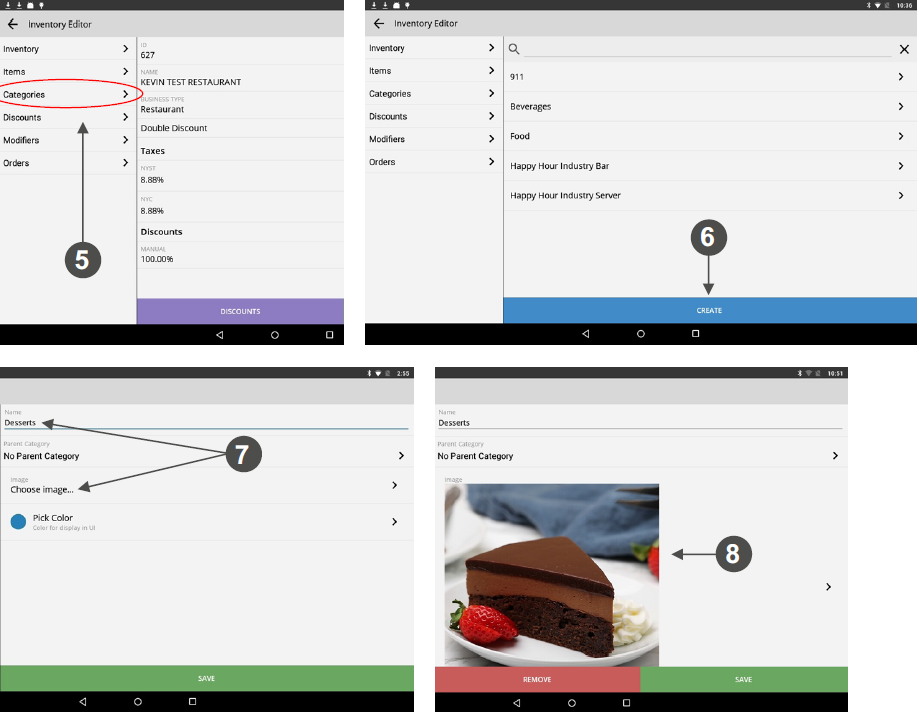
5. When the INVENTORY EDITOR/MANAGE INVENTORY appears click on CATEGORIES.
6. A list will appear to the right of your screen with a button at the bottom. For Android devices tap CREATE. For iOS devices tap ADD NEW.
7. A new window will pop up, allowing you to enter the name of your new category. We have chosen DESSERTS as an example. At this stage you can also add an image to enhance recognition of your category. Tap CHOOSE IMAGE.
8. A pop-up menu will appear at the bottom of the screen, allowing you to choose an image from your galley or your camera. Select the appropriate image and it will appear on the screen below your new category heading.
9. Click the SAVE button to save the category.
10. Once your category is saved it will appear in the list on the right-hand side of your screen along with the other categories in your store.
11. To go back to your Tab screen, click on the back-arrow button in the top left-hand corner of your screen. Keep pressing this button until your Tab screen comes up.
12. Your new category icon will be visible at the bottom of your Tab screen.